A3.4.1 (4.2.2026)
Release notes
- Version 3.4.1 fixes a bug in file export in Process Tab.
- AndiScan A3/Mark2 FW is supported in Version 3.4.0 and later.
- live-view and control for rate-of-fire measurement in full-auto burst
- annotations of locally stored files in Process tab
- internal processing optimizations
- Requires AndiScan with A3/Mark-2 A3FW-US_A3.4.0/A3FW-TXR_A3.4.0 firmware for full functionality of rate-of-fire measurements. It is backward compatible with previous US/TXR A3.2.x/A3.2.x FW.
Basic User Guide
Use AndiScan app to connect to your AndiScan A3 ballistic velocity Doppler chronograph using Bluetooth Low-Energy (BLE) communication protocol. The app allows full remote control, measurement live view, data management, file listing, file view with super-easy export to other apps and/or computer (including file copy/paste), full remote configuration settings, FirmWare over-the-air upgrades, and many more features.
Connecting device
- Fill the device ID (e.g. A30100CA) into the text input field.
- Press “Connect” to connect the device over bluetooth (BLE).
- Press “Disconnect” to disconnect the device.
After a successful connect, the device ID will be stored in the App and does not need to be entered again, unless a new device is used.
A link icon and BLE signal strenght indicators are shown next to the button.
Application buttons are dimmed and inactive if the connection status or operation mode do not allow to use them.
Information and message line
The display field below the connect button shows operation mode information on left-hand side.
On the right hand side, the status messages are shown.
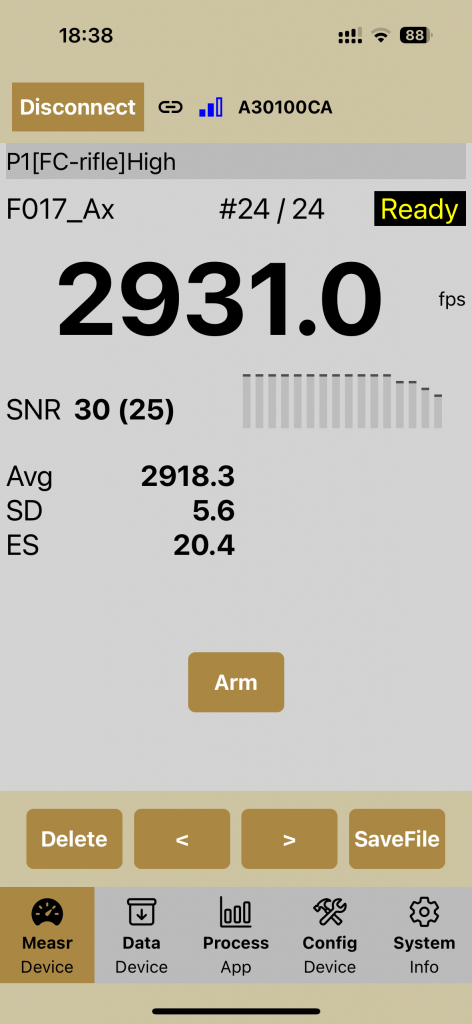
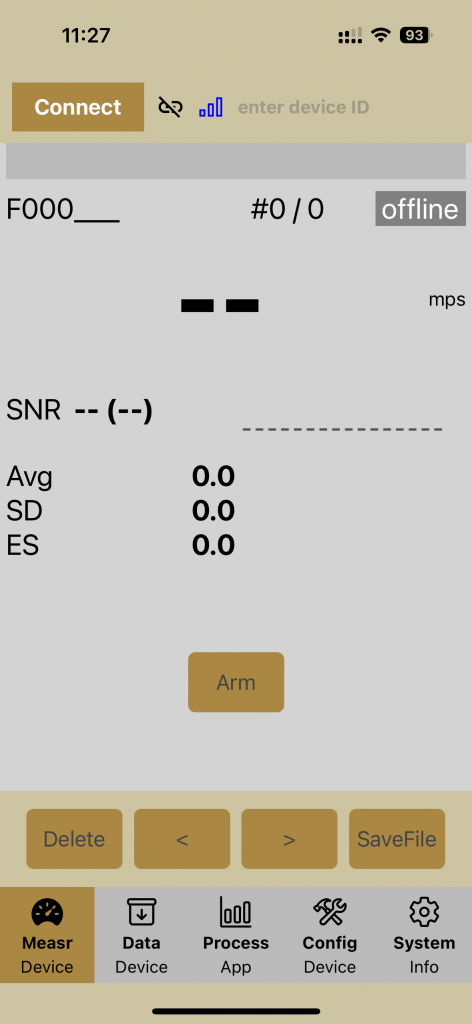
Measr Tab
A remote control and live view of the measurement is performed here. The device must be connected on BLE.
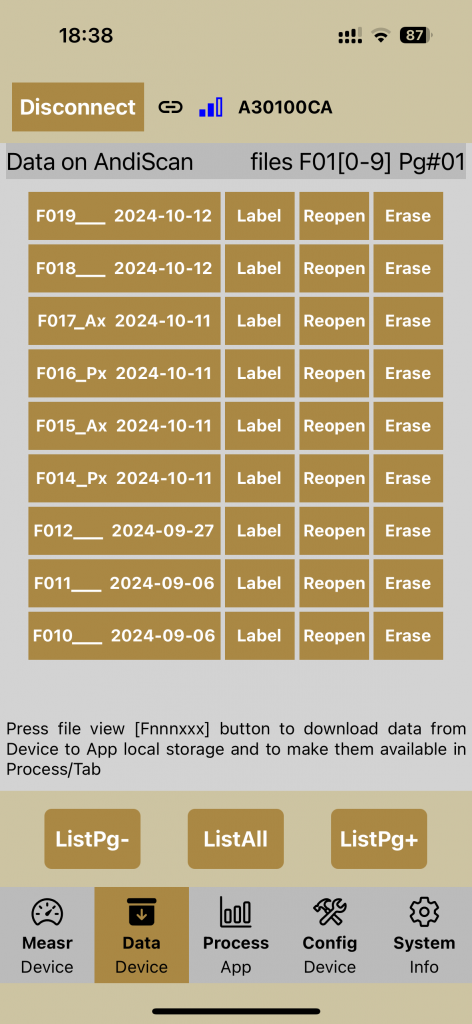
Data Tab
For accessing files in Data tab, the device must be connected on BLE.
In Data tab, the file operations (list, view, label, reopen, erase) are done directly on the device as if it would be operated using its physical buttons.
Any file on the device viewed in App by touching its file name in Data tab is automatically transferred to the App and stored there locally for later (off-line) use.
When switching to Mode Tab, a current page of files is listed. Buttons allow to list neigboring pages or a full list of all files on the device.
Loading a long list of files may take some time.
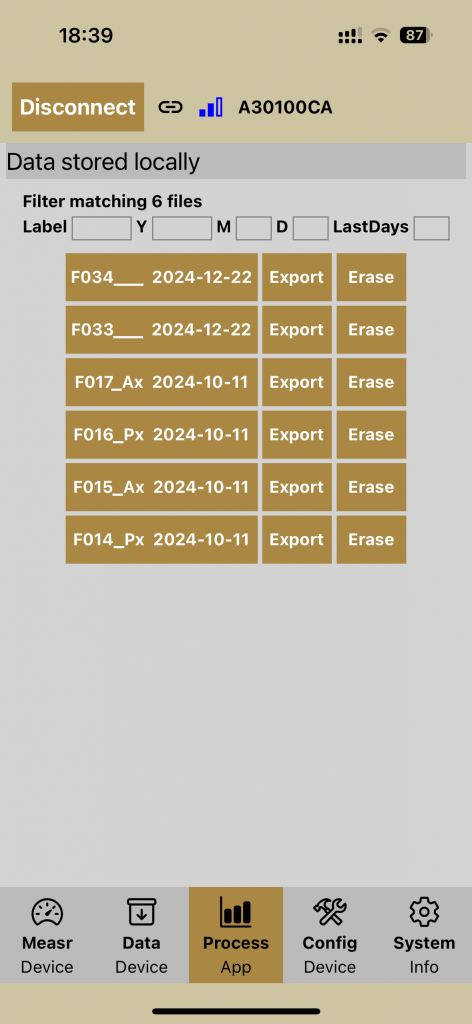
Process Tab
All files locally stored in the App are listed in Process tab. For listing and working with them, the device does not need to be connected and the acces to them is very fast.
Files can be viewed, exported or erased. Erasing locally stored file does not affect the file on the device.
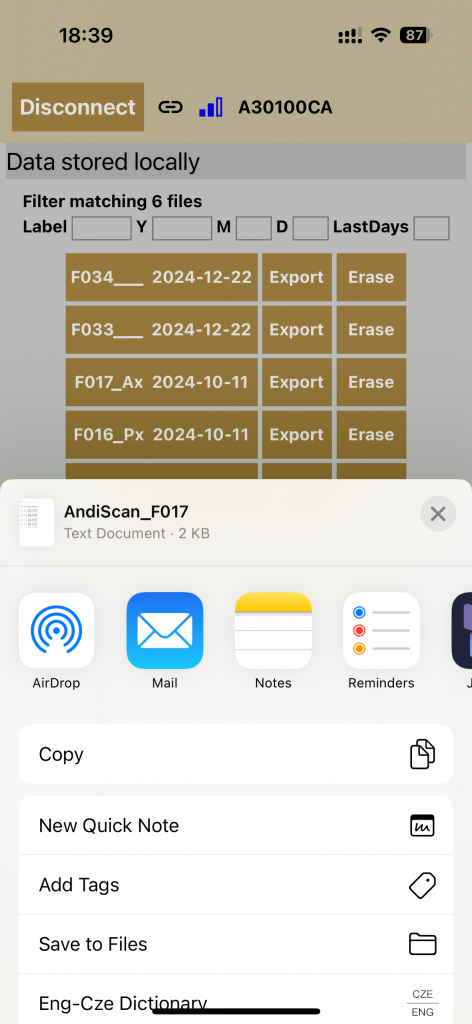
File export
Files can be exported to other mobile device applications, to various export channels (depending on your mobile device configuration), or directly copy/paste to desktop computer.
The exported files use CSV (comma separated values) format.
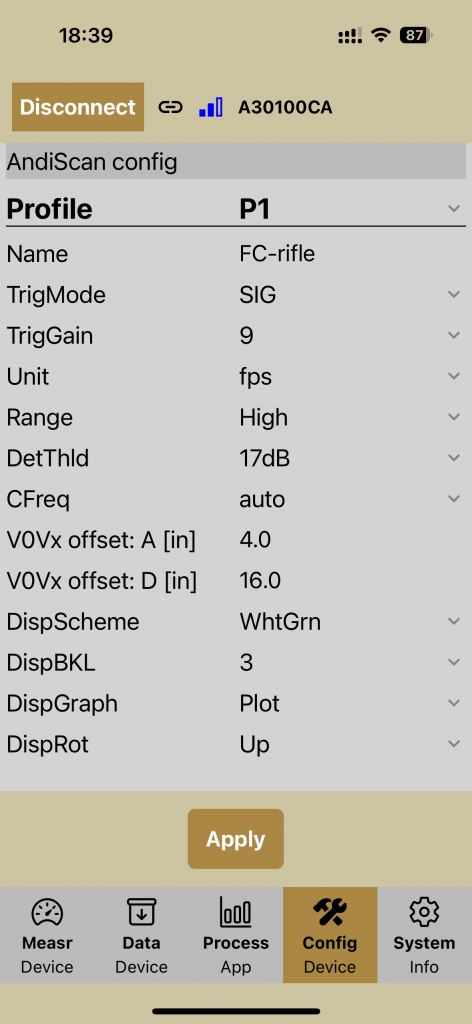
Config Tab
Config Tab allows to select a configuration profile of the device. Each profile is an independent set of device settings suited for a given measurement scenario.
There are 8 factory predefined profiles but each setting can be individually edited by user. Pressing the name of the config parameter shows a short help about its function.
Pressing “Apply” button loads the edited setting into the device. Also, at any pressing of “Apply” button the time and date on the device is updated by the current values.
When only changing the profile, without any editing, the change is loaded instantly to the device, and pressing “Apply” is not needed. It is only needed when the parameters are edited.
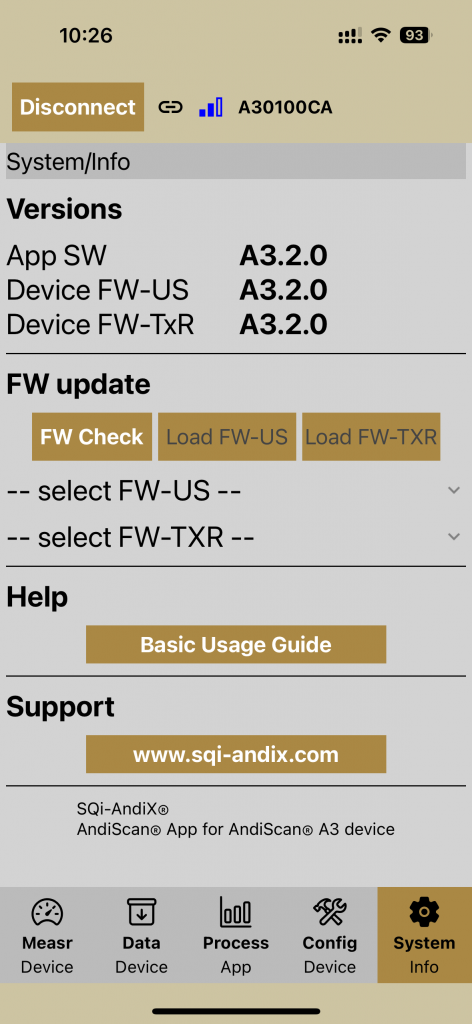
System Tab
System Tab shows current the versions of the App and both parts of the device firmware FW-US (UserShell) and FW-TXR (Transceiver) (if the device is connected).
Firmware update
- Press button “FW Check” to check on-line for the available FW versions. The App must have an internet connection. The versions can be selected individually for FW-US and FW-TXR. Disconnect USB-serial cable from the device.
- After selecting the versions, press “Load FW-US” and/or “Load FW-TXR” buttons to load the binary files into the device over BLE. The device must be connected on BLE. Observe the progress indicator and do not disconnect nor power-off the device unless all is finished.
- The new firmware will be installed on the next restart of the device – observe the progress messages on the device. During the firmware installation (on restarting the device after FW load), the device must _not_ be connected on USB-serial port.
- The device can be generally upgraded or downgraded and FW-US and FW-TXR do not need to be installed both at once unless one FW requires a given version of the other one.
See the support pages at https://www.sqi-andix.com/support/ for details.
Installation
android
- android app is available in two forms
- Google/PlayStore
- App is installed by standard PlayStore installation procedure on your android device
- Direct installation apk file
- Latest version link for direct installation A3App-android.apk
- Download and open the file on your android device
- Open the App
- At the first connection to the AndiScan device, and depending on the particular version of your android OS, the following steps on your android device may be necessary.
- Allow AndiScan to access this device’s location
- Allow AndiScan to find, connect to, and determine the relative position of nearby devices
- Possibly reopen the App and/or restart the AndiScan device
- On all subsequent App connections to the device, nothing more than simply pressing the “Connect” button with having filled the DeviceID is needed. After the first successful connection also the DeviceID will be remembered by the App.
- Google/PlayStore
iOS
- iOS app is available on Apple/AppStore
Previous versions – release notes
- A3.4.0 (24.1.2026)
- Support for A3/Mark2 FW
- live-view and control for rate-of-fire measurement in full-auto burst
- annotations of locally stored files in Process tab
- internal processing optimizations
- Requires AndiScan with A3/Mark-2 A3FW-US_A3.4.0/A3FW-TXR_A3.4.0 firmware for full functionality of rate-of-fire measurements. It is backward compatible with previous US/TXR A3.2.x/A3.2.x FW.
- Support for A3/Mark2 FW
- A3.2.1 (4.1.2025)
- ios = A3.2.0 – no change
- android
- fix – hang during FW load for some specific android configuration/version
- Requires AndiScan with A3FW-US_A3.2.0/A3FW-TXR_A3.2.0 firmware
- A3.2.0 (31.12.2024)
- Initial production version
- Requires AndiScan with A3FW-US_A3.2.0/A3FW-TXR_A3.2.0 firmware